 how-to
How to Compare Uniform Embroidery Prices
Table of Contents
- Understanding the Key Factors That Affect Embroidery Pricing
- Embroidery Stitch Count Explained
- Custom Workwear Embroidery Setup Fees
- Embroidery vs Screen Printing Cost Comparison
- How to Calculate Your Total Embroidery Cost
- Step-by-Step Guide to Comparing Quotes
- Common Hidden Costs and How to Avoid Them
- Conclusion
Last Updated: August 12, 2026
Understanding the Key Factors That Affect Embroidery Pricing
When sourcing embroidered workwear, the price you're quoted depends on several interconnected factors: the garment itself, setup work, stitching, positioning, and design complexity. Understanding each helps you compare quotes fairly and avoid surprises.
The most common mistake is treating all embroidery quotes as equivalent. Two suppliers quoting the same garment can arrive at vastly different prices because they're calculating different things separately.
Stitch Count and Design Complexity
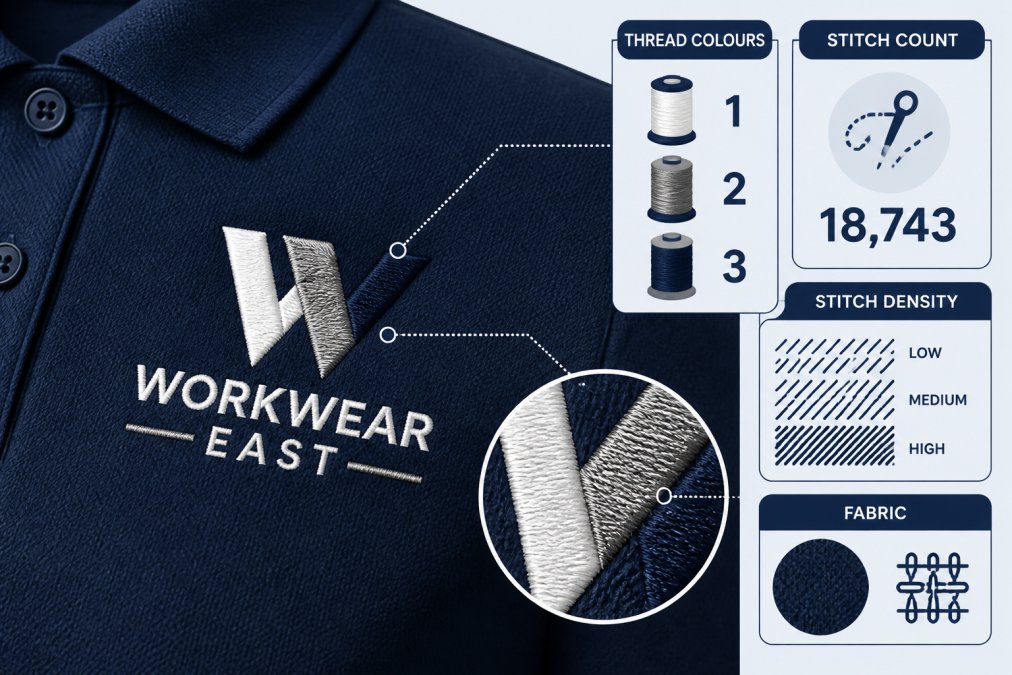
Stitch count is the total number of individual stitches in your embroidered logo or design. It's a primary cost driver because more stitches mean more thread, more machine time, and more precision required.
A simple two-colour company name might use 5,000 stitches. A detailed multi-colour logo with shading could reach 15,000-20,000 stitches. Higher stitch counts require longer machine time and more skilled digitising to ensure clean reproduction on fabric.
Design complexity goes hand-in-hand with stitch count. Intricate details, thin lines, small text, and subtle colour transitions all demand more stitches and more skilled work. A supplier will assess complexity first, estimate stitch count, then calculate per-garment costs based on that figure.
Garment Type and Material
The garment you're embroidering affects both setup and per-unit cost. Embroidering dense cotton is straightforward. Stretchy synthetics, knits, or heavy workwear jackets require different stabilisation techniques and machine settings.
Natural fibres like cotton and wool hold stitches predictably. Synthetic blends and technical fabrics can shift during embroidery, requiring experienced operators and sometimes additional stabilisation materials. These adjustments add time and cost.
Garment weight and construction also matter. A lightweight t-shirt is quicker to embroider than a heavy-duty work jacket. Embroidering a chest logo is faster than multiple positions (front, back, sleeves), and each additional position typically incurs a separate per-garment charge. When ordering Branded Polo shirts or other workwear items, clarify positioning charges upfront to avoid surprises.
Embroidery Stitch Count Explained
Stitch count is the total number of individual stitches your design contains, measured in thousands. It directly influences thread usage, machine runtime, and per-garment cost.
How Stitch Count Influences Per-Garment Cost
Most suppliers charge based on stitch count ranges: designs under 5,000 stitches cost one rate, 5,000-10,000 stitches cost another, and anything above 10,000 moves into a higher bracket.
This tiered approach exists because machine time increases with stitch count. A 3,000-stitch logo takes roughly half the machine time of a 6,000-stitch design. Simplifying your design to stay under a lower threshold delivers immediate per-garment savings that multiply across your entire order.
Estimating Stitch Count for Your Logo
You won't know exact stitch count until a supplier digitises your artwork, but you can estimate. Simple, bold logos typically fall into 3,000-7,000 stitches. Moderately detailed designs land around 8,000-12,000 stitches. Highly detailed designs can exceed 15,000 stitches.
Ask suppliers to estimate stitch count before committing. A good supplier will digitise your logo as part of quoting and tell you exactly what you're getting. This transparency lets you decide whether to simplify the design to reduce costs or accept higher stitch count for visual quality.
Custom Workwear Embroidery Setup Fees
Setup fees are one-off charges covering work required to prepare your design for production. They're separate from per-garment costs and apply regardless of order size.
What Digitising Fees Cover
Digitising converts your logo artwork into a format the embroidery machine can read. A skilled digitiser examines your design, breaks it down into stitches, assigns thread colours, determines stitch direction to avoid puckering, and sets machine parameters.
A simple logo might take 30 minutes to digitise. A complex multi-colour design can take several hours. Suppliers typically charge a flat digitising fee depending on complexity.
File format matters. Clean vector files (Adobe Illustrator, CorelDRAW) digitise faster and cheaper. Low-resolution images or hand-drawn sketches require recreation from scratch, costing more time and money.
When Setup Fees Are Waived
Some suppliers waive digitising fees for orders above a certain quantity or value. This is a common incentive for larger orders.
When comparing quotes, factor in whether setup fees are included or separate. If you're reusing a design you've already paid to digitise, make sure the supplier knows. You shouldn't pay digitising fees twice for the same logo.
Embroidery vs Screen Printing Cost Comparison
Embroidery and screen printing are the two dominant methods for applying logos to workwear, with fundamentally different cost structures.
Cost Per Garment at Different Order Volumes
At small volumes (under 25 garments), embroidery is typically more economical. Screen printing requires expensive setup to create screens, and those costs only spread efficiently across larger runs.
As order volume increases, screen printing becomes more competitive. At 50+ garments, screen printing's per-garment cost often drops below embroidery, especially for simple single-colour designs. For very large orders (200+ garments), screen printing is almost always cheaper per unit.
However, design complexity reverses this. A multi-colour, detailed logo is expensive to screen print (requiring multiple screens). That same logo is straightforward to embroider. For complex designs, embroidery often remains cheaper even at moderate volumes.
Durability and Long-Term Value
Embroidery wins decisively on durability. Embroidered logos outlast screen-printed logos by a significant margin. Embroidery uses thread stitched into fabric and survives dozens of washes, industrial laundering, and years of daily wear without fading, cracking, or peeling.
Screen printing applies ink to the surface. Over time, especially with frequent washing or sunlight exposure, ink breaks down. Colours fade, edges crack, and prints eventually peel away.
For workwear lasting 2-3 years, embroidery delivers better total cost of ownership. You pay more upfront but don't replace garments annually. Construction firms and industrial operations typically prefer embroidery for this reason.
How to Calculate Your Total Embroidery Cost
Total cost isn't just per-garment price multiplied by quantity. Account for setup fees, positioning charges, and bulk discounts.
Breaking Down the Cost Formula
Total Cost = (Garment Cost × Quantity) + Setup Fee + (Per-Garment Embroidery Fee × Quantity) + (Additional Position Charges if applicable) - Bulk Discounts
Example: 50 polo shirts. Digitising fee. Embroidery per garment for single left-chest logo.
- Garment cost: (Garment Cost × Quantity)
- Setup fee: (Digitising Fee)
- Embroidery: (Per-Garment Embroidery Fee × Quantity)
- Total: (Calculated Total Cost)
Adding a back-neck position per garment:
- Garment cost: (Garment Cost × Quantity)
- Setup fee: (Digitising Fee)
- First position: (Per-Garment Embroidery Fee × Quantity)
- Second position: (Additional Position Charge × Quantity)
- Total: (Calculated Total Cost with Second Position)
Using Bulk Pricing Tiers to Your Advantage
Most suppliers offer volume discounts in tiers:
- 1-24 garments: standard rate
- 25-49 garments: 5% discount
- 50-99 garments: 10% discount
- 100+ garments: 15% discount
These typically apply to per-garment embroidery fees. If your base cost is £2.50 and you qualify for 10% discount, you pay £2.25 instead.
The discount threshold matters strategically. A 45-piece order versus 50 pieces might make the larger order more economical per unit. Calculate both scenarios before deciding.
Step-by-Step Guide to Comparing Quotes
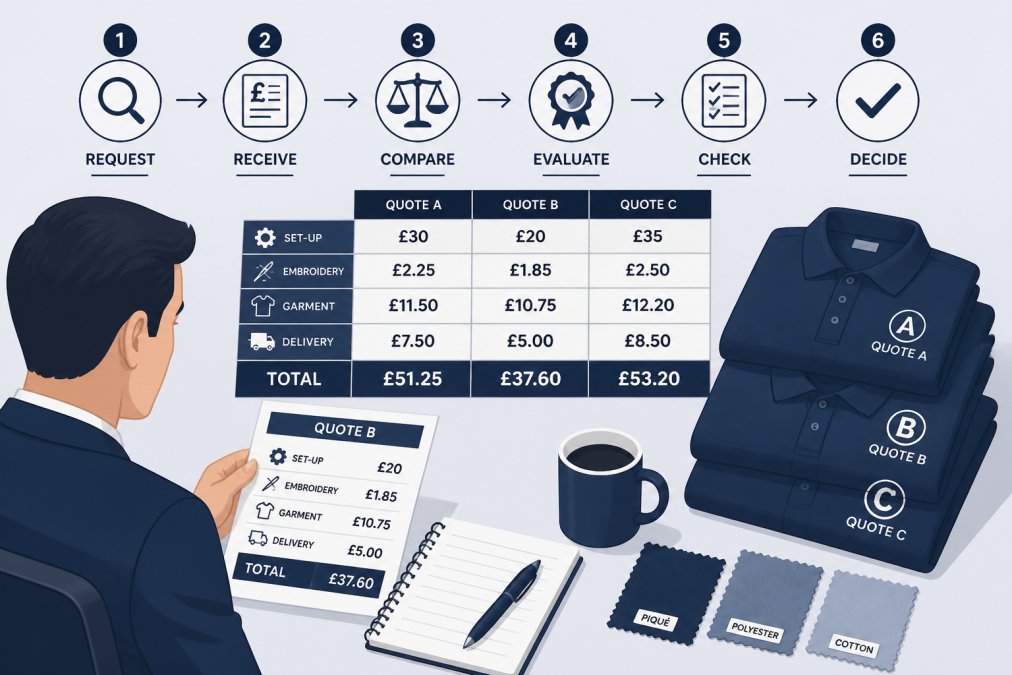
Comparing quotes accurately requires consistency. Small specification differences lead to incomparable quotes.
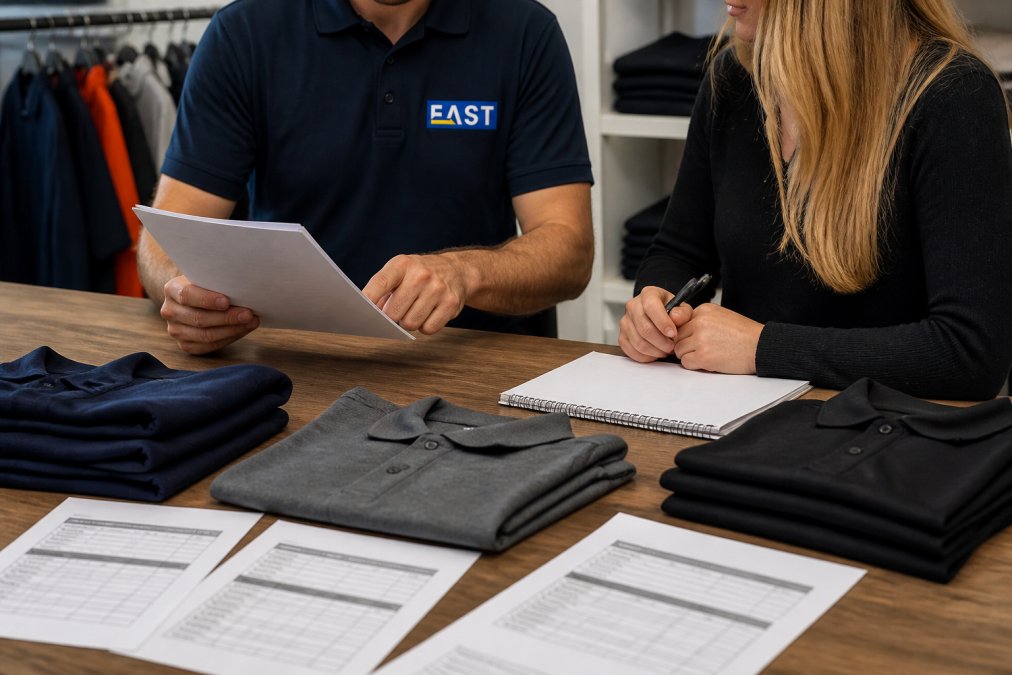
Step 1: Prepare Consistent Specifications
Document exactly what you're ordering before requesting quotes. This specification sheet becomes your standard brief for every supplier.
Include:
- Garment type, colour, and size range
- Logo artwork (provide the same file to every supplier)
- Logo placement (e.g., "left chest, 100mm width")
- Any additional positions
- Preferred thread colours
- Turnaround time required
- Delivery location
Step 2: Request Itemised Quotes
Ask each supplier to break down their quote into components:
- Garment unit price
- Digitising fee (if applicable)
- Per-garment embroidery fee and stitch-count estimate
- Additional position charges
- Volume discounts applied
- Delivery cost
- Turnaround time
- Payment terms
Itemisation reveals where cost differences originate. One supplier might be cheaper on garments but more expensive on embroidery.
Step 3: Identify Hidden Charges
Check for charges not appearing in every quote. Common hidden costs include:
- Rush fees (for faster turnaround)
- Artwork modification fees
- Colour-matching fees
- Minimum order charges
- Restocking fees
- Handling or processing fees
Ask every supplier directly: "Are there any charges not listed here?"
Step 4: Evaluate Quality and Turnaround
Price isn't the only variable. Quality and reliability matter for workwear. When comparing suppliers, consider whether they offer solutions like Workwear Bundles or Workwear Portals that can streamline ordering and management for larger teams.
Ask suppliers for samples of their embroidery work on the same garment type you're ordering. Examine stitch density, colour accuracy, edge definition, and overall finish. Poor digitising results in loose stitches, puckering, or thread breakage. Good digitising produces clean, tight, durable embroidery.
Turnaround time is another practical consideration. The cheapest quote might come with a 4-6 week lead time. If you need garments in 2 weeks, that quote doesn't help. Ask about their process for managing sizing issues or quality problems.
Common Hidden Costs and How to Avoid Them
Several costs catch businesses off guard beyond obvious embroidery charges.
File Format and Artwork Requirements
Suppliers have specific requirements for artwork files. If you don't provide the right format, you'll pay a fee for conversion or recreation.
Ideal formats are vector files: Adobe Illustrator (.ai), CorelDRAW (.cdr), or PDF (vector, not rasterised). If you provide a low-resolution image, JPEG, PNG, or hand-drawn sketch, the digitiser must recreate your design from scratch, costing significantly more.
Before sending artwork, ask the supplier what formats they prefer. Provide the highest-quality version you have.
Rush Fees and Delivery Charges
Standard turnaround is typically 5-10 business days. Faster turnaround incurs rush fees. Delivery charges vary widely, some suppliers include delivery in their quoted price; others charge separately based on quantity and destination.
Ask whether delivery is included in the quote or charged separately. Confirm the delivery address and any associated costs before accepting a quote.
Minimum Order Quantities
Some suppliers impose minimum order quantities or charge handling fees for small orders. Confirm this when requesting a quote.
Conclusion
Comparing uniform embroidery prices effectively means looking beyond the per-garment number. Stitch count, setup fees, garment type, positioning, bulk discounts, and hidden charges all shape your final cost. The lowest quote isn't always the best value, durability, quality, and reliability matter for workwear that needs to perform.
When you're ready to move forward, Workwear East specialises in durable custom embroidery for corporate uniforms and branded workwear with advanced embroidery machines capable of handling intricate, multi-colour designs. Whether you're outfitting a small team or managing a large fleet of uniforms, the team can walk you through the cost breakdown and help you understand what you're paying for.
For a personalised quote that accounts for your exact specifications, garment type, design complexity, order volume, and timeline, email info@workweareast.co.uk for a quote. They'll provide transparent, itemised pricing so you can compare confidently with other suppliers and make an informed decision.
Frequently Asked Questions
How do I calculate embroidery prices when comparing quotes?
Break down each quote into four components: garment cost, per-unit embroidery cost, setup fee (digitising), and delivery. Multiply the per-unit embroidery cost by your quantity, add the setup fee once, then add garment and delivery costs. This reveals the true total cost of ownership. Compare quotes using the same specifications: identical garment type, logo size, stitch count, and order quantity. Suppliers may quote differently if you give them varying details.
What is stitch count and why does it matter for embroidery pricing?
Stitch count is the total number of individual stitches that make up your embroidered logo. A simple two-colour logo might be 5,000 stitches, while a detailed multi-colour design can exceed 15,000. Suppliers charge based on stitch count because more stitches mean longer machine time and more thread. Higher stitch counts also cost more to digitise. Understanding your logo's stitch count helps you compare apples-to-apples across suppliers and identify whether a quote is reasonable for your design complexity.
Is embroidery or screen printing cheaper for workwear uniforms?
For small orders (under 25 items), embroidery is often more cost-effective per garment because screen printing has high setup costs. For large orders (100+ items), screen printing becomes cheaper per unit. Embroidery also offers superior durability and professional appearance for workwear, lasting through hundreds of washes without cracking or fading. Consider your order size, logo complexity, and how long you need the uniforms to last. For a small construction team needing durable branded gear, embroidery typically delivers better long-term value despite higher per-garment costs upfront.
What hidden costs should I watch for when comparing embroidery quotes?
Common hidden charges include digitising fees for new logos (typically £15-£25), rush delivery surcharges, minimum order quantities that inflate costs, file format conversion fees, and charges for logos exceeding a certain stitch count (usually 20,000 stitches). Some suppliers also charge separately for each logo placement, a left-chest logo plus back-neck logo means two charges. Always ask suppliers to itemise every cost and confirm whether setup fees, delivery, and any additional placements are included. Request quotes in writing to avoid surprises at checkout.
Ready to move forward? Contact Workwear East for a detailed quote on your embroidered workwear. Visit [EXTERNAL_LINK: Workwear East | workweareast.co.uk] or email info@workweareast for a quote, and let their team help you find the right balance of quality, durability, and cost for your team's needs.
This article was written using GrandRanker