 how-to
How to Remove Embroidery from Work Shirts
Table of Contents
- Why You Might Need to Remove Embroidery from Work Shirts
- Best Tools for Removing Embroidery
- Step-by-Step Process for Removing Embroidery
- How to Fix Holes After Removing Embroidery
- Protecting Your Fabric During Removal
- Professional Embroidery Removal Services
- Conclusion
- Frequently Asked Questions
Last Updated: September 28, 2026
Why You Might Need to Remove Embroidery from Work Shirts
Your team's uniforms have faded, peeling logos. Maybe your company rebranded, you're switching suppliers, or you need to reclaim quality garments that are too good to throw away.
How to remove embroidery from work shirts saves money and extends garment life. Strip the old design and start fresh rather than discarding perfectly good apparel.
Learning how to remove embroidery from work shirts is doable at home with basic tools, though the challenge is avoiding fabric damage. This guide covers the process, essential tools, and repair techniques.
Best Tools for Removing Embroidery
You don't need much to get started. Most of these items cost just a few pounds and live in any sewing kit.
Essential hand tools
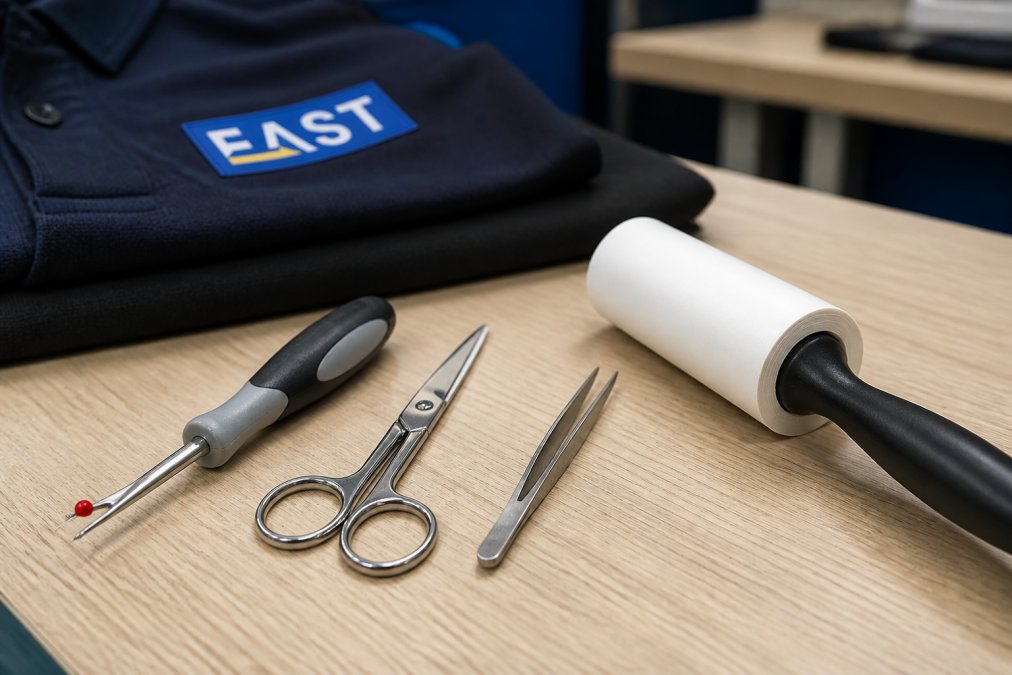
Seam ripper. This small, sharp tool is essential. The curved blade slides under threads without piercing fabric. This is the one tool you cannot skip.
Small scissors or thread cutter. Once threads are loosened, scissors finish cleanly. Embroidery scissors or a thread cutter (circular tool with internal blade) work best.
Tweezers. Precision tweezers with a fine point pull out remaining thread bits after cutting.
Lint roller. After removal, fabric is covered in loose fibers and thread bits. A lint roller clears these away fast and prevents them from embedding back into the weave.
Optional equipment for easier removal
Stitch eraser. An electric stitch eraser cuts threads automatically and is faster than hand removal, but noisier and riskier for delicate fabrics. Useful if removing embroidery regularly.
Steam iron. Heat softens thread tension, but press gently, aggressive heat damages synthetics or melts threads.
Magnifying glass or headlamp. Magnification helps with small logos; a headlamp leaves both hands free.
Step-by-Step Process for Removing Embroidery
This is where precision matters. Rush the job and you'll damage the shirt. Take your time and you'll preserve the garment.
Preparing your work area
Lay the shirt flat with good lighting. Position the embroidered area clearly and pin corners to prevent shifting. Examine the back to identify thread knots and any backing material (stabilizer) glued to the fabric.
Removing the top stitching
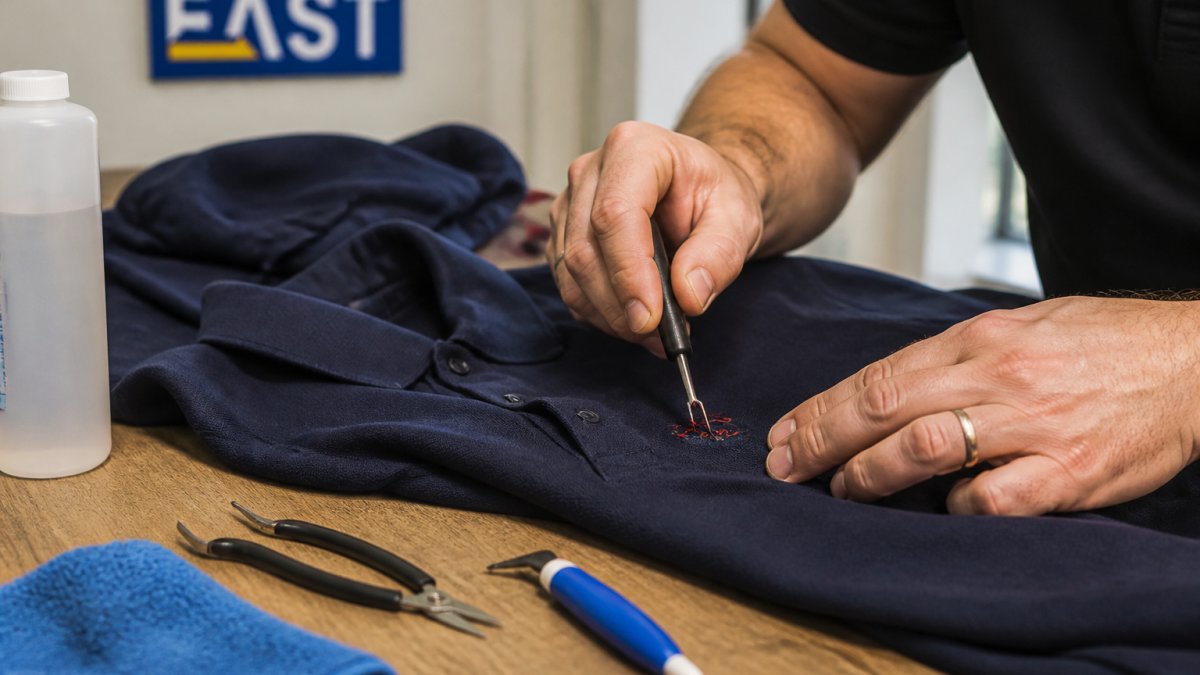
Slide the seam ripper blade under a stitch and pull gently upward. Work along one row, lifting each thread without yanking. Once loosened, snip threads close to the fabric with scissors or a thread cutter, then pull away with tweezers. Repeat across the entire embroidered area.
Handling the bobbin thread
Flip the shirt inside out to access the bobbin thread layer. Repeat the seam ripper and scissors process carefully, as fabric is now more vulnerable. If there's a stabilizer backing, peel it away slowly from a corner, or cut it into strips first if needed.
Cleaning up residue and loose fibres
Use a lint roller over both sides of the removed area in multiple directions. Examine under bright light and remove stray threads with tweezers. If adhesive residue remains, rub gently with your finger, most dries and flakes away within hours. For persistent loose fibers, lightly dampen a cloth and dab the area.
How to Fix Holes After Removing Embroidery
Removing embroidery almost always leaves visible marks from needle holes and compressed weave. The question is whether it matters and how to address it.
Understanding the 'ghost' mark problem
A 'ghost' mark, a faint outline from compressed fibres and needle holes, is normal and often invisible after drying or washing. Cotton recovers within 3-5 washes; polyester holds compression longer (10-15 washes). Delicate fabrics show marks permanently and are poor candidates for removal unless a new logo will cover the area.
Assessing needle hole damage
Pinhead-sized holes are cosmetic and need no action. Larger holes or visible tears need repair, especially if the shirt will be worn without a new logo. If the fabric feels smooth and holes are barely visible, skip repair if a new logo will cover the space or the shirt is for internal wear only.
Repair techniques for different fabrics
Cotton and cotton blends: For small holes (pinhead to 2mm), use matching thread to stitch near the hole, pulling fibres together. Repeat 3-4 times in a circle and knot on the back. For larger holes (3mm+), use an iron-on patch for speed or a hand-stitched patch if the area will be covered by a new logo.
Polyester and synthetic blends: Avoid heat; use fabric glue instead. Apply around the hole's edge and let dry 24 hours. For larger holes, use a self-adhesive fabric patch designed for synthetics.
Delicate fabrics (silk, fine wool, linen): Avoid patching if possible. If repair is necessary, use the smallest patch and hand-stitch with matching thread. Consider whether the garment is worth the effort.
When repair isn't worth the effort
Skip repair if the shirt is destined for a new logo, the ghost mark is faint, or the garment is heavily worn. For bulk removal, accept minor cosmetic marks or plan new logos to cover the removal area rather than hand-repair dozens of garments.
Protecting Your Fabric During Removal
Prevention is easier than repair, but knowing what can go wrong, and how to recover, is equally important. This section covers both the precautions that prevent damage and the troubleshooting steps for problems that arise mid-removal.
Core precautions: speed, tension, and tool sharpness
Work slowly. Budget 45 minutes to an hour for a standard logo. Do one shirt at a time; fatigue and impatience cause accidents.
Keep fabric flat and stable. Pin the shirt so it doesn't shift, but don't pull it tight. Tension makes fibres vulnerable to tearing.
Use sharp tools. Dull seam rippers and scissors require more force and risk slipping. Replace tools when they feel dull.
Test first if nervous. Cut a tiny stitch on a hidden area or scrap to gauge how much force the fabric can handle.
Fabric-specific precautions
Cotton and cotton blends: Forgiving and recover well. Standard removal works; avoid yanking threads.
Polyester and synthetic blends: Avoid heat entirely, it can melt threads or fuse them to fabric. Work at room temperature and use sharp tools to minimise pilling.
Performance fabrics: Check the care label. If it warns against heat or harsh treatment, use hand removal only.
Delicate or aged workwear: Use the gentlest technique. Consider whether removal is worth the risk; a new logo over the old one may be safer.
Troubleshooting: what to do when things go wrong
Problem: Thread is fused to the fabric (won't separate cleanly)
This happens when embroidery machines use heat-set threads or when synthetic threads have melted slightly into the weave. The thread and fabric feel bonded together.
Solution: Stop trying to pull the thread out. Instead, carefully cut the thread as close to the fabric as possible using sharp scissors or a thread cutter. Leave the fused bits in place. They'll loosen and shed naturally over 3-5 washes as the fabric is agitated. Trying to force fused thread out will tear the fabric. Patience here prevents damage.
Problem: Fabric is fraying or pilling during removal
This is common on polyester and performance blends, especially if the seam ripper is dull or if you're pulling too hard.
Problem: You've accidentally torn the fabric
When to call it quits
If you encounter significant fraying, multiple tears, or fused thread that won't budge, the shirt may not be worth saving. Workwear is designed to be durable, but some garments, especially older ones or those made from delicate materials, simply aren't suitable for embroidery removal. Recognising this early saves time and frustration.
Professional Embroidery Removal Services
Sometimes DIY isn't the answer. If you're removing embroidery from 50 shirts for your team or you're worried about damaging expensive garments, professional removal makes sense.
Conclusion
Removing embroidery from work shirts is achievable with patience and the right tools. Most jobs take under an hour and cost just a few pounds in supplies. The real challenge isn't the technique, it's resisting the urge to rush.
Frequently Asked Questions
Can you remove embroidery from a shirt without damaging the fabric?
Yes, you can remove embroidery safely if you work slowly and use the right tools. A seam ripper and tweezers allow precise removal of individual stitches without tearing the underlying fabric. The key is patience: rushing causes fraying and needle holes. Most delicate fabrics respond well to careful hand removal, though some damage is almost unavoidable if the embroidery was densely stitched. Using a stabilizer backing during the original embroidery process minimises fabric stress, but removal still requires care.
Will removing embroidery leave visible holes in the shirt?
Needle holes are inevitable when removing embroidery, as the needle creates permanent punctures in the fabric weave. However, the visibility depends on fabric type and stitch density. Tightly woven fabrics like cotton show fewer holes because the fibres compress back together. Lightweight or stretchy materials show holes more obviously. You can minimise visibility by using a steam iron to reset the fabric after removal, which helps the weave relax and close slightly. For heavily embroidered areas, small holes may remain visible unless repaired.
What is the best tool to remove embroidery stitches?
A seam ripper is the most effective tool for embroidery removal because its small, sharp blade cuts individual stitches without snagging fabric. Tweezers work well for pulling out loose thread residue after the seam ripper has cut the stitches. A thread cutter provides precision for dense designs, whilst a lint roller removes loose fibres afterward. For delicate fabrics, a combination approach works best: seam ripper for cutting, tweezers for extraction, and a lint roller for cleanup. Avoid scissors, which can catch the garment and cause tears.
Should I remove embroidery myself or use a professional service?
DIY removal works for small, simple designs on sturdy fabrics if you have time and patience. However, professional embroidery removal services are worth considering for valuable garments, delicate fabrics, or large complex designs. Professionals have industrial-grade tools and experience assessing fabric damage risk. For workwear, DIY removal is often practical since work shirts are durable and frequent replacement is expected. If you need new branded workwear after removal, contact Workwear East for a quote on replacement embroidered or printed options tailored to your business needs.